
In this blog post, we will explore how to create a powerful API that can convert HTML into PDFs with just a few clicks. We will achieve this using BuildShip, a platform that allows you to visually create backend cloud functions, APIs, and scheduled jobs, all without writing a single line of code. 💯
Zapier vs Make (formerly Integromat) vs BuildShip
Existing workflow builders like Zapier and Integromat can be limiting in the customizations they offer, excessively overpriced, and can make you wait for months to build integrations for your favorite apps.
BuildShip, on the other hand, comes with its own extensive library of pre-built nodes. You can choose from popular integrations like Stripe, Firebase, Supabase to AI models like Stability AI, HuggingFace, OpenAI and access the node logic to tweak it and fit your use case. Plus, if a node is missing, you can generate your own nodes using AI. 🪄
Let's dive in and see how it's done!
Building the Workflow
Creating a Trigger
To begin, we need to set up a trigger for our backend. In our BuildShip project, we can add a new trigger by clicking on the "Add Trigger" button. For this example, we will use a REST API call as our trigger. We specify the path as "HTML-to-PDF" and the HTTP method as POST.

Adding the Nodes
Next, we add a few nodes to our workflow. BuildShip offers a variety of nodes and for this example, we’ll be adding the UUID Generator node, followed by the HTML to PDF node to our workflow.
The UUID Generator node generates a unique identifier, and we’re going to use this as the name for our generated file to be stored.
Now, we can add the "HTML to PDF" node. This node has three inputs: the HTML content, Options to configure the returned PDF, and the file path to store the generated PDF file.

Converting HTML to PDF
With the HTML input in place, the selected node will convert the HTML into a PDF and save it to the cloud. We can retrieve the download URL using the “Generate Public Download URL” node and adding the filepath from the previous node. We will use this to generate the download link for the PDF. Adding a return node allows us to specify the HTTP status and the value to be returned. In this case, we set the status to 200, and the value comes from the "Download URL" of the return note.

Shipping to the Cloud
Once everything is set up, we are ready to ship our backend to the cloud. Clicking on the "Ship" button deploys our project and makes it ready for testing.

Testing the Functionality
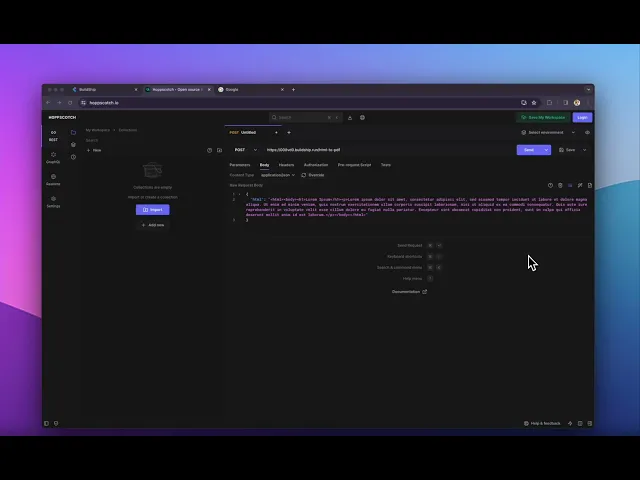
To test our backend, we can use Hoppscotch, a tool that allows sending POST requests with HTML-to-PDF conversion. By providing the HTML content as a request body, we generate the PDF and obtain the URL. Opening the URL in a new tab, we can see the converted PDF in action, featuring a lovely Lorem Ipsum text.
Expanding Functionality with URL-to-PDF Conversion
In addition to converting HTML to PDF, BuildShip also allows us to generate PDFs from URLs with ease. To do this, we replace the existing node with the "URL to PDF" node. Instead of passing HTML content, we fetch the URL parameter from the request body.

Enhancing the Workflow
To improve the workflow, we can modify the note to return the file path by using AI-based modification. This path can then be used to upload the file to BuildShip’s internal storage and make the URL public. By configuring the upload file node with the current date and a designated folder, we ensure easy organization and access to the PDFs.
Conclusion
BuildShip provides a user-friendly interface that allows you to create a powerful backend for converting HTML into PDFs, whether it's through direct HTML content or URLs. With just a few clicks, you can set up triggers, add nodes, and ship your project to the cloud. The flexibility of Billchip enables you to expand on this functionality, bringing your ideas to life. Start exploring the possibilities and unlock the power of no-code backend development.


